Saturday, July 27, 2013

"Under the Sea" Felt Board (To Go)

Here's an idea I found for keeping kiddos entertained on a road trip: felt boards on a clipboard!  Felt can be glued on the back of the clipboard.  I chose to make an "Under the Sea" theme, so I added a little "sand" (tan felt) and some wavy green sea-plant-things (green ric-rac and felt).  


All the pieces, made of felt, can be kept in a Ziploc bag clipped to the other side. 

I added googly eyes to all the animals. 

I only glued down the bottom edge of the sea plants so fish can swim through them.

A turtle, a crab, a shark, a starfish, a clam, and five fish... quite a busy little scene!

Wednesday, July 24, 2013

Jumping Cups Activity

We always need craft ideas for our summer get-togethers in playgroup.  Here's an activity we found: jumping cups! 


All you need: plastic cups, scissors, rubber bands, tape, and a print-out of a rocket (or anything else that can jump or fly). I didn't print mine on cardstock, but next time I will.  It could also be laminated. 


Directions: Color the picture and cut out.  Cut four small slits, evenly spaced, around the rim of the cup.  Snip a rubber band in half.  Knot the ends of each rubber band and place in the slits so it makes a cross in the inside of the cup.  Place a bit of tape on the inside of the cup where each rubber band is knotted, to help hold it in place.  This will be your cup that you place on top of another.  Glue or tape the picture on the top cup.  Place another cup underneath.  Push down the top cup and let it spring loose.  And there you have it... jumping cups!

Saturday, July 20, 2013

Coffee Filter Butterfly Craft

Another fun summer afternoon activity!  This idea is from this blog post.   

Supplies needed:
coffee filters
markers
spray bottles filled with water
clothespins
pipecleaners
googly eyes

Step 1: Color the coffee filters with markers.  Spray with a little water (not too much) so the colors run together a little.  Let dry. 

Step 2: Scrunch the middle of the filter and add a clothespin.  Hot-glue on some googly eyes.  Cut a pipecleaner in half and twist it into an antenna shape.  You can hot-glue that into place, too, although we haven't yet.  Kate added little mouths with markers. 


Miss Maggie demonstrating the flight of the butterfly

Friday, July 19, 2013

Recycled Materials Robot Craft

I'm always looking for good craft ideas for a hot summer afternoon.  Yesterday, Jack wanted to make a robot.  Hmm... of course, I turned to Pinterest.  We scrolled through hundreds of ideas before I compiled a few.  All we needed was cardboard from a box in the recycling pile, foil, a hot glue gun, a Sharpie, googly eyes, and different-colored craft foam.  I also offered him pop can tabs and milk jug lids, but he didn't use them.
First step: cut out cardboard in the shape of a body, head, arms, and legs. Cover them with foil and tape the back.  Hot glue the pieces into place. 


Second step: decorate however you want! 


Sunday, July 14, 2013

DIY Watercolor Paints

How awesome is it that you can make your own watercolor paints at home, using just a few simple ingredients (vinegar, baking soda, cornstarch, corn syrup, and food coloring) that you probably already have on hand?  We had to get a couple extra ice cube trays so each kid could have his/her own tray, but we've been able to use these several times now, so it's definitely worth it.  I found complete directions at this site.


What can I say?  My kids are natural artists!  :-)

Saturday, July 6, 2013

Rainbow Hearts Applique T-Shirt


I found this fun, simple idea for applique here.  It was easy enough to find fabric in the six rainbow colors in my stash.  The best thing about this shirt?  She can wear it with just about anything! 


Tuesday, July 2, 2013

American Flag Applique T-Shirts

Our 4th of July shirts were inspired by this tutorial, which promises to take no more than 10 minutes to complete.  I used Wonder Under, like with all my applique, which isn't mentioned in the tutorial, so mine took a bit longer, but still.  These shirts for the girls I whipped up in maybe half an hour the other night.  And for Jack?  A matching tie applique on his red t-shirt.  I had a vision of taking their picture in the Radio Flyer in front of the nearby pecan orchard while they were eating ice cream cones... and it almost happened.  The possibility of mosquitoes never crossed my mind.  And, yet, as we were unloading the wagon from the back of the van at the orchard, we were absolutely attacked by the horrendous creatures!  Imagine me, yelling at the kids to get back in the van and close the windows, re-loading the wagon (which didn't fit well in the first place), and worrying about melting ice cream cones.  And now imagine me driving back home (only a couple houses away) with the back of the van open because I didn't want to take the time to wedge the wagon in the right way.  All the while slapping mosquitoes on my arms and listening to Kate's panicked cry.  Mother of the Year right here!  We ended up taking our pictures in front of the garage door.  And they still turned out super cute.


A close-up of the applique on the girls' shirts


Sunday, June 30, 2013

Glue & Salt Painting

I'm always looking for a good hot summer afternoon craft project to keep these kids busy.  This one was a bit messy, but the kids still had fun, and their creations look pretty.  All you need is white glue, salt, and a little bit of water with food coloring in it (which we used medicine cups for).  Draw a picture with the glue and sprinkle salt to cover.  Dip a paintbrush in the colored water and touch the tip of the brush to the glue.  The color spreads nicely.  Kate, age 4, had to have help with her glue and salt, but Jack did most of the project on his own. 


Kate's sun

Friday, June 28, 2013

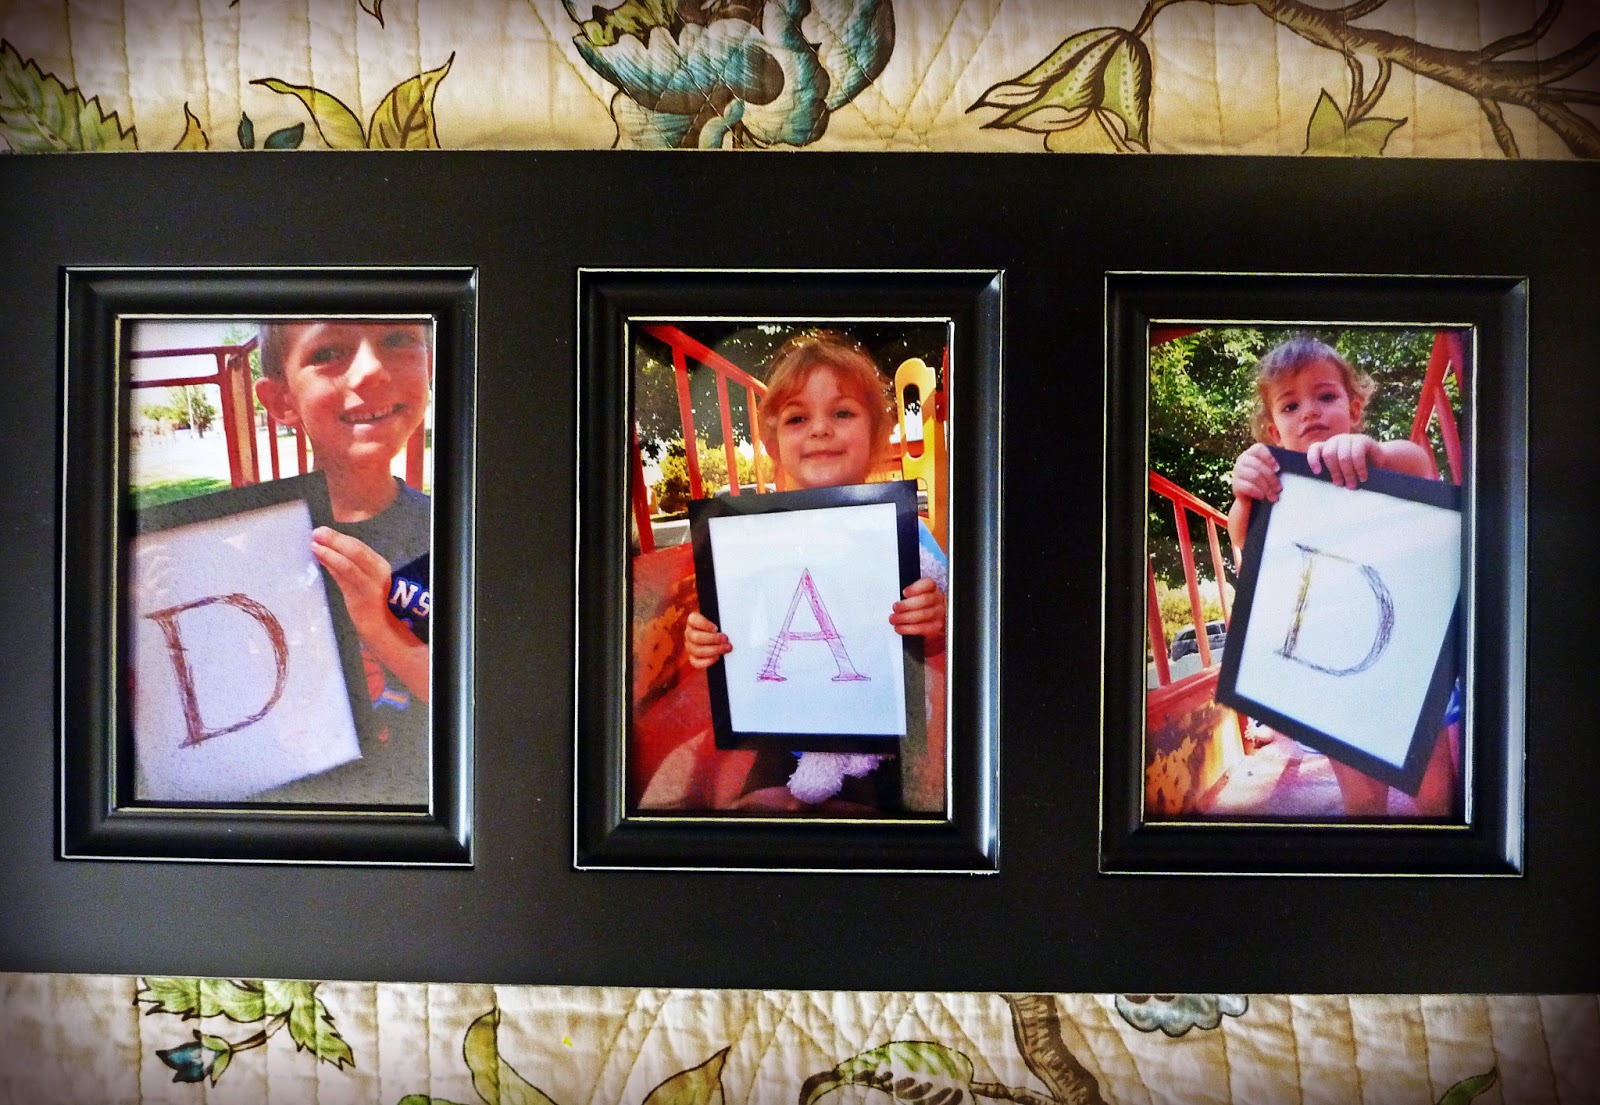
Three-Picture Frame for Fathers' Day Gift

Three letters in the word DAD?  Three gorgeous kids?  A nice black frame with spaces for three pics?  Perfect Fathers' Day gift!  Well... the idea was brilliant.  The execution?  Not so easy.  Especially when I left the photography part to the last minute and only had a few minutes at a playground to get pictures of the kids holding their framed letters. 


I got several shots of Jack's tongue.  Six-year-old boys!

Kate was sweet as always.


Maggie, however, was soooo not into it. 
 
I believe she was saying "HERE!" in this shot, trying to give me back the frame.

These photos just crack me up.

Yes, that would be MY hand holding the frame.

Poor thing just wanted to go down the slide.


Ta-Da!  Our finished product.  Definitely not perfect.  Someday I'll replace the pictures with better ones.

Tuesday, June 18, 2013

Pirate Ship Applique T-Shirt

The kids and I went to a pirate-themed birthday party a few days ago.  Super fun: they got tattoos, dug for buried treasure, and came home with a load of salt water taffy.  I made the birthday boy, three-year-old David, a pirate ship-appliqued t-shirt.  I found the original idea here.  He--and his mom--loved it!


I used white "puffy paint" for the skull and crossbones.

Thursday, June 13, 2013

Princess Crown Applique T-Shirts

So, I forgot.  I said I didn't do anything special, besides the invitation, for the girls' princess party.  But I actually whipped up a couple t-shirts for them to wear on party day.  That's special, right?  I did a simple princess crown applique for both of them. 


Look!  Maggie is learning to stand still for a picture!


Sunday, June 9, 2013

The Girls' Princess Party Invitation

So, we threw the girls (4-year-old Kate and soon-to-be-2-year-old Maggie) a princess party yesterday.  Although, after going (probably) overboard for most of the kids' birthday parties in the past couple years, I really wanted to make this one simple.  No fancy decorations, no carefully thought-out themed foods, and no elaborate games.  Just a playground, pinata, some backyard games set up to use at leisure, a table of snacks, and a homemade vanilla cake with strawberry cream cheese frosting.  I did, however, create a fun little invitation.  My inspiration: this picture I found on Pinterest (but can't trace it to the source!):


Super cute, huh?  We borrowed several good-quality princess dresses from a friend and hung them on a clothesline in the courtyard of my husband's grandma's condo (the greenest spot in town!).  Set up a couple chairs, gave the girls some books, and took a million pictures, hoping at least one would turn out as magically as the inspiration photo.  We got one!


I fixed up the picture at Pixlr.com to make it into a birthday party invitation. 


I am a little sad that I couldn't take the time this year to put together a special party... but people had fun, and the hubs said last night that he liked that I was much less stressed than in years past. :-) 

Thursday, May 30, 2013

Felt Bandages for Dolls and Stuffed Animals

This was a fun little project to whip up.  I just cut flesh-colored felt into a long oval shape, then sewed Velcro on the back to make bandages for all Kate's dolls and animals.  She keeps them in her new doctor's kit.